April 25, 2012

Strawberry Field of Dreams with Sabayon

Strawberry season is in flux and as I trial variations of strawberry hand pies with pre-made puff pastry to attempting pastry dough from scratch, here's a simple strawberry recipe to satisfy a late night dessert craving until I find a presentable hand pie recipe to share. 

I've tried a few version of sabayon and of course, the version with a dash of champagne/moscato or sweet marsala is best, but those are ingredients I don't normally have in my pantry or don't want to open a new bottle of wine just to use a few dashes. For those nights where you simply crave a good, refreshing dessert on a whim, this is it. Takes about 10 minutes to prepare. 

Ingredients
Strawberries (as much as you want/don't want)
2 egg yolks
1/8 cup of sugar
Juice from 1/2 of lemon
1/2 cup heavy cream

1. Wash and slice the strawberries to the size of your liking. Place in individual serving bowls. Seriously, any bowl will work but I like to put these in clear glass so I can watch the sabayon slowly seep down the sides to cover each of the strawberries before I happily consume the entire contents. It's the little things that make you smile each day, right?
2. Simmer about a cup of water in a pot and with a bowl large enough to put on top without touching the water, put the egg yolks and sugar. You can whisk by hand but I brought out my hand mixer and beat the egg/sugar mixture until creamy/silky and is a pale yellow color. Take off heat. With the same hand mixer and in another bowl, beat the heavy cream until it turns into whipped cream.

*Variation. If you do happen to have moscato or champagne around, mix the sugar with the wine first and then add the egg yolk before putting over the double boiler.
3. Gently fold the two together. Add in the squeeze of lemon juice. Dollop a few spoonfuls over the strawberries. Eat it right away!

*Variation. You can also add in a dash of vanilla extract but I think it's too overpowering, if you can believe it. I would, though, recommend adding a bit of lemon zest to up that flavor a bit.

April 23, 2012

Darn Perfect Sunday Breakfast at Home

Just a quick snapshot of my perfect no fuss Sunday breakfast this weekend. Two pancakes, fresh strawberries and pure honey for a dash of sweetness.

Toss in a perfect cup of coffee like this and your breakfast just became a little more perfect.
Hoping your weekend eating was just as great!

March 26, 2012

Why Yes, It Can Be That Good. Underbelly Houston

For the past few months, hype around the new Underbelly has been teased via local articles, Houston foodies/blogs, and heck, even a Time magazine article. The restaurant finally opened earlier this month and having gone this past week - twice, might I add - it was definitely not a disappointment. Underbelly is the creation of Chris Shepard, a well known chef in Houston who previously headed up the popular Catalan. He loves his meat. Next door and with whom they share a kitchen, is The Hay Merchant, a place for beer enthusiasts and a small selection of unique appetizers.

You'll notice that I've slowed the frequency of my restaurant reviews. I realized I'm not really giving a restaurant a chance by only going once. My thoughts of new restaurants now typically show up when I've been able to dine a few times to give it a fair chance. Well, I have to share my experience at Underbelly because I've dined twice (by accident), and they were delicious both times and just too good not for everyone else to know.

Our supper club on Friday had the five of us sharing a slew of the small plates in addition to the family style pork loin:
-Seasonal vegetables: Nicely pickled and ranged from cauliflower, carrots and cucumber. A nice start to the meal.
-Korean braised goat with dumplings: One of my favorites. It had a nice spicy kick and the goat was not over powering (it was my first time to have goat so I was curious about the flavor) and the dumplings were firm logs of dough, a little more firm than what you normally consider for a dumplings.
-General Tso's pork meatballs: We were smart and ordered two of these to share with five. Yes, I am weary of General Tso anything and am typically not a fan, but the meatballs were quite good! A nice surprise by how much I liked them.
-Pickled shrimp with vegetables
-Family style pork loin: Pork can easily dry out but this was tender and moist with an exceptionally crispy and salty crust. It was accompanied with a slew of veggies in the cast iron pan. Really divine and served the five of us plenty. I would highly recommend this if you see it on the menu.

Now, let's get to the dessert. One of the highlights. We shared the brownie, beet creme and the golden star of the night, the strawberry fried pie. Seriously, notice that it's the only thing I've bolded here, it's that good. 

Let's just say that I didn't stop mid convesation to say "omg, this is amazing." Sharing the strawberry pie among five ladies....hard. I relished each bit and then thought of it a little more. So much that the next evening, after having full sushi dinner, we opted to skip dessert and head to Underbelly to have the strawberry pie in their wine bar area. Best decision of the weekend. We shared one pie per couple, which meant I got half - yippee! We paired it with a nice pale ale from Belgium. Afterwards, we started thinking about the other small plates and proceeded to order two more dishes....our second dinner of the night. The flanks steak with slaw on a tortilla and a variation of a dish I tried the night before, Korean braised rabbit with dumplings (top picture). Again, both were delicious.

Gahh, I think I could come here too often. As for price, I could see how this could get pricey for two, but with our supper club, it was a great deal for around $50 pp. The small dishes were, yes, small but we were able to try many and a family style dish that served plenty. I left full and happy.

As for the service, it was spot on. I typically don't like to go to an opening night restaurant as you sometime risk new servers and the restaurant getting its service in order. With just a month under their belt, they were attentive without being overbearing and prompt. The only down side? It's a little loud but what restaurant nowadays isn't?

Seriously, go try this place. Like, right now. Are you there yet?

Underbelly
1100 Westheimer
713.528.9800

February 27, 2012

Forget the Texas 'Winter,' I'm Making Braised Beef Short Ribs (Take 2)

It's February and a humid 70 degrees outside. I think the lowest temp this winter (or whatever Texas winter we get) has been high 30's for oh, a few days? When I think (and feel) winter, I crave hearty soups, roasted and braised meats, chili, bread pudding.... These past few months, I think I have made one each of the above when I normally make them several times. 

Well, forget the weather. I saw these beautiful short ribs in the store and bam! instant craving. Tomato-y braised meat with white rice. Perfect meal. I've made this once before. Working off the same recipe, I adjusted based on what I had in the fridge/pantry and if you scroll through the below pictures, you may notice a new pot - a fiery red dutch oven thanks to my awesome brother and sister in law! 

Braised Short Ribs
Recipe adapted from Ina Garten

3 beef short ribs
3-4 tbsp olive oil
1 onion, chopped
4 small yellow potatoes, peeled and chopped
2 large carrots, peeled and chopped
4 garlic cloves, chopped
2 tsp of dried thyme (if you have fresh, even better)
2 tsp of dried basil
Dashes of garlic powder
2 cans of chicken stock
1 can of whole tomatoes
1 can of tomato paste
Dash of sherry
1 tsp of brown sugar
S&P

1. Preheat oven 400 degrees.

2. Make sure your short ribs are nice and dry. Sprinkle both sides with S&P as well as garlic powder.
3. With a hot dutch oven, add olive oil and sear the short ribs on all sides. I do my ribs one by one and it's quick. A few minutes on each side until you get a nice light brown sear.
4. Put the seared ribs on a plate and set aside. Add the onions and garlic to the same pot with all the oil and yummy beef goodness.


5. Once the onions start to get glossy, add in the carrots and potatoes. Keep stirring. Add in the thyme and basil.  Add in the sherry.  Stir, cook for a minute. Ddd in the canned tomatoes, paste, chicken stock and sugar. Give this a good stir.
6. Give the sauce a quick taste to see if it needs S&P, garlic powder, more herbs, etc. Once you are happy with the flavor, add the ribs back to the pot. Cover and put in the oven for 1-1.25 hours.
7. Make some white rice and wait patiently. The below is a beauty, huh? So, the meat falls off the bone, taste is there but it falls off in one entire piece. I still think it could be just a tad more tender (enough to break apart with fork) so next time, I'll probably try to simmer the meat in water for an hour or two before starting this process - like what my brother in law, Eric, does with the pork ribs for his pork sinagong. I know, that means the dish prep goes up to 4-5 hours... Worth it? 

Also, you'll have quite a bit of sauce left over, which I pureed with my immersion blender and added it to some pasta with some Parmesan cheese. Two meals in one! 

February 22, 2012

My Perfect Cup of Coffee. Happiness.

There's no question that I love my cup (or two) of coffee in the morning. Have you seen the Folger's commercial where the smell wakes everyone in the house and everyone has a smile on their face? That's me. The smell of coffee makes me extra happy. A morning without my coffee is a morning you don't want to be around me. 

Before I started working from home, I was a Starbucks regular. Now since I'm home every day, I have my coffee brewing down to a science. I've gone from a coffee maker to a french press, which I think provides me with the best brew. You can control how long the water steeps with the coffee grinds and it provides a more robust or "umph" flavor.  While not food, I thought I'd share this staple of my every morning because sometimes coffee is my breakfast =).

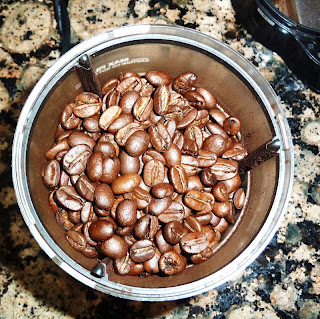
1. Start with freshly grind coffee beans. Seriously. Makes a big difference. Take the extra two minutes in the morning to do this step. 
2. Depending on the coffee beans (I typically like a medium to bold flavor), you'll need to adjust the amount of coffee you add. I add three heaping tablespoons of coffee.
3. With hot water from my kettle, I fill to the top and use my trusty, multipurpose chopstick to give it a good stir. 
4. Add the top and let this sit for a few minutes.
5. While the coffee is steeping, I prepare my milk. I am a soy milk fan. I've tried regular milk and almond milk but soy wins the race. I either use unsweetened soy (but need to add a little more sugar) or vanilla soy milk (already sweetened but I only need a teaspoon of sugar). I filled about 1/8 of my big coffee mug with soy milk and heat it up for one minute.
6. With unsweetened soy, I add 2.5 to 3 teaspoons of sugar. I don't like the taste of Splenda or other artificial sweeteners (they taste overly sweet to me) so adjust how much you add base on the type of sugar you prefer. 
7. Give the soy milk and sugar a good stir and then pour in the coffee!
8. With a happy smile and boost to start the day, here's my perfect cup of joe. Isn't it beautiful? What's your perfect cup of coffee?

February 07, 2012

Seafood Risotto w/Shrimp

Remember this photo? 

Yeps, Christmas dinner feast of lobster and hot pot.  Expanding on our lobster feast, I saved the shells and steaming liquid to cook lunch the following day - seafood risotto with bok choy and shrimp. While it's easy, it does take a little time to cook down the lobster broth and then make the actual risotto.  If you don't want to use the broth right away, I still recommend cooking down the broth and freezing so you can use for future recipes! 

Lobster Broth Ingredients
5 cups water
Remaining water you used to steam the lobster (we had a good 2-3 cups remaining)
Lobster shells (the head has the most flavor)
2 celery stalks, chopped into pieces
1/2 onion, cut into large chunks
2 carrots, chopped into pieces, no need to peel
Couple dashes of garlic powder

1. In a very large pot, put all the ingredients together and bring to a boil. Add more water if you need.  Bring down to a medium heat and cook for about 20-30 minutes. Periodically mix the pot so that the shells at the top get their chance at the bottom of the pot in the liquids.  

2. Once done, take off heat and strain so you are left with the beautiful lobster broth!  Put in fridge if you are not using immediately.  As mentioned earlier, this would also be great to freeze and bring out when you need a seafood broth for a pasta or rice dish. If it's too much to use at once, perhaps freeze them in ice cube trays so when you need a boost of seafood flavoring - say to a great bowl of ramen - you can simply toss in a cube or two.

Lobster Risotto
Lobster broth
3 cups arborio rice
3 garlic cloves, chopped
1/2 onion (remaining onion from above)
1/2-1 cup white wine (or whatever you have left)
10 shrimp, thawed and deveined 
Chopped basil
Freshly grated parm. cheese (however much you'd like)

Beware, you'll be using several bowls and pots!

1. Heat up the lobster broth in another large pot until boiling. Here's a neat little trick - since we'll be serving the risotto with shrimp, I cooked the shrimp in the lobster broth first!  I like to likely under cook the shrimp since we'll add it back to the risotto later.  Keep watch of this as the shrimp cook quickly - take out, set aside and turn the heat to medium to keep the broth hot.

2. Heat a large pot with olive oil.  Add the garlic and onion. Cook until onion is fragrant and somewhat clear. Add the rice and give it a cook mix to coat each grain with the oil olive goodness.  

3. Add in the white wine and give it a good ole stir, scrapping up the bits and yum stuff at the bottom of the pot. Turn down to medium high and let this cook until at least half the wine has been absorbed/cooked off.

4. Hope you are not terribly hungry at this time because it will be another 20 minutes or so before this is ready....  Turn down the heat to medium low.  Take two ladle full of broth, add to the rice, stir and watch the grains absorb the broth goodness.  Make sure to continually stir so nothing sticks.  As the liquid disappears, keep adding ladles of the lobster broth until the rice is cooked and you get a creamy goodness mixture.  Don't feel pressured to use all the broth.  Or, if you are low on broth, you can substitute with chicken broth or water - just make sure to warm it up before adding to the rice.
5. If you'd like to serve with veggies, bring another pot of water to a boil. Toss in the bok choy and cook until done - about 5-7 minutes.  Strain and set aside.  Seriously, any veggies will work in my opinion.  We just needed to balance out the overload of carbs....well, as much as we could..even if just a tiny bit.

6. Once the risotto is done, take a quick taste and see if you need additional salt or pepper.  My broth had a naturally salty flavor so I didn't need to add much.  Toss some basil on top and add in the cheese.  
7. Serve in bowls with 2-3 shrimp and some veggies.  Enjoy!

January 18, 2012

Lemon Roasted Cauliflower

Roasted cauliflower is my go-to, no fail veggie side dish. In fact, I love it so much, I will sit there happily eating an entire bowl all. by. myself.  No guilt.  This dish is open to variations. I've been wanting to incorporate anchovies into the mixture and I think capers plus the juice would go well.  I've tried adding the lemon juice and found that I don't enjoy the overly tangy flavor it brings out in the cauliflower.  I like them slightly crispy and salty.

Roasted Cauliflower
Serves 4 as a side


1 head of cauliflower
3 garlic cloves (smashed)

1/4 cup olive oil (I use just under a 1/4 cup)
Generous pinch of salt and pepper
Zest of half a lemon

1. Preheat oven to 400 degrees. Break the cauliflower into florets, wash and thoroughly dry. Place on a baking sheet. 

2.  In a bowl, I like to smash the garlic with a fork - if you don't like garlic much, only use one or two. Mix together with the lemon zest and the olive oil. If you like a more pungent lemon flavor - zest the whole thing. Pour over the cauliflower on a baking sheet. Using tongs or your hands, make sure each is evenly coated. Sprinkle a good amount of salt and pepper.
3. Bake for 20 minutes or until the cauliflower starts to brown.  Those tiny florets that are just a little extra crispy?  Don't toss them, they are the best part!  Best served warm but I won't lie. I've eaten these cold from the fridge as a snack!