September 13, 2011

Chocolate Ganache Cupcakes

No long post to start. Just the recipe and my thoughts. I felt the cupcakes were a little too dense and a tad dry. I would consider adding in 1/2 cup buttermilk and/or sourcream to lighten this recipe up. Also, this was incredibly easy to make. Making the actual batter took about 15 minutes and the ganache about 10 minutes. The ganache is fantastic but makes way too much for the dozen or so cupcakes. I ended up using it as a fruit dip for snacks!

Chocolate Ganache Cupcakes
Makes 1 dozen cupcakes and 6 mini-cupcakes
Adapted from Ina

1 stick butter (room temperature)
1 cup flour
4 eggs (room temperature)
16 oz  Hershey's chocolate syrup (note, I couldn't find this and used hershey's chocolate syrup typically used for ice cream)
1 tbspn vanilla extract
1 cup sugar
1/2 cup heavy cream
1/2 bag of chocolate chips
2 tbspn of espresso or very strong coffee

1. Pre-heat oven to 325 degrees.

2. In an electric mixer, cream the butter and sugar together. Make sure the butter is room temperature. I actually leave my butter out the night before if I know that I'll be baking with it the next day. You may be tempted to go ahead and bake with fresh out of the fridge butter, but highly recommend you wait just two hours. Trust me, I was that person and after making a dessert the room temperature butter, I saw a difference. Your dessert is more moist and creams significantly better. 

3. Next, crack the eggs in a measure cup. Then add them one by one to the mixer. Add in the vanilla. 
4. Add in the chocolate syrup, making sure to scrape down the sides of the mixer periodically to ensure the batter is well mixed. I couldn't find the Hershey's syrup at my grocery store, so I substituted with Hershey's hot fudge syrup. The same? Probably not but I think it worked to provide that intense chocolate flavor. Next, slowly add in the flour in three batches.
5. Spray your cupcake pan and fill each to about 3/4 of the cup. These cupcakes don't rise too much. I also baked some mini-cupcakes as well!
6. Bake in the oven for 25-30 minutes. For the mini-cupcakes, they only took about 12-15 minutes.
7. For the cupcake ganache frosting, heat the heavy cream in a double boiler. Once simmering, add in the chocolate chips and mix until all the chips are melted. Add in two tbspn of espresso or very strong coffee. It should be shiny and silky.

8. Once the cupcakes are done and cooled, dip the top of the cupcake into the chocolate ganache. Set on platter to set.

August 23, 2011

Creamy Chicken Pesto Pasta

When you have that one tomato left in the fridge or some rotisserie chicken leftovers, this is the easiest dish to make - granted, not the healthiest but easy and satisfying. Pesto is a staple in my fridge and with my abundance of basil in my garden, I like to make pesto every couple months to replenish my stock. You can keep pesto in the freezer in a tight container with plastic wrap touching the pesto and then the lid over that. It should keep for a month/two months max. I don't even let this defrost when I need it. I just take a few spoonfuls and put it directly into my hot sauce/pan, and it tastes pretty great every time. 

Creamy Pesto Pasta with Chicken and Tomatoes
Serves 2-3
1/2 cup heavy cream
3 tbsp butter
4 large spoonfuls of pesto (approximately 4-5 tbspn but really to your taste)
1 tomato chopped
Shredded chicken (I had leftover rotisserie chicken that I shredded)
Grated Parmesan cheese 
4-6 basil leaves, sliced into slivers (optional)

1. Bring large pot of water with good heaping of salt to a boil.  Toss in some pasta - I like ones that have holes/shells to scoop up the sauce - and let it cook for 8-10 minutes or via box directions.  

2. In a saucepan, heat up the heavy cream and the butter. Bring this to a boil and then once boiling, turn heat down to medium.
 
3. Take 4 large spoonfuls of pesto and add to the heavy cream mixture. Add more/less for your preference on how 'pesto-y' you'd like your sauce. Mix well and let it cook on medium for a 2-3 minutes to let the pesto incorporate and get all happy with the cream.  Add S&P if you need to - I did not. Your pesto may already be well seasoned so make sure to keep tasting!

4. Roughly chop up your tomato (or whatever fresh veggies you may have) and shred the chicken. You can certainly omit the chicken and add more veggies - broccoli or even spinach would be good in this dish.  
5. Drain your pasta (save some of the water if you'd like to add to the pasta if its too dry/thick) and put into the serving bowl. 
6. Now, mix everything together!  For the pesto sauce, don't add all at once but by large spoonfuls until it meets your preference.  Some freshly grated Parmesan cheese and some slivers of fresh basil on top - done!

August 20, 2011

Restaurant Review: The Blue Fish (Washington)


Friday evenings, you'll most likely find us at a sushi restaurant and then home with a Redbox movie where I most likely fall asleep before the end. Tired much?  The Blue Fish (not to be confused with Blue Fish on Richmond) is a new sushi restaurant on Washington, having just opened about three weeks ago. They have another location in downtown right by the Verizon center and several locations in Dallas.  I have to say, I pretty much loved this place - while pricey, it was really unique and good! Best part - so close to me that we timed it going back home - six minutes!

Our waiter, Aaron, was very nice and so soft-spoken, he literally could recommend something and it would be hard to say no, because he's so nice. We took three of his recommendations and liked each one. 


Ahi Tower (Sorry, no picture): It's rice, snow crab, avocado salad and tuna tartar piled up into a tower. The waiter brings it to your table and "mixes" the ingredients together, ensuring that the wasabi sauce and caviar are well incorporated together with the said tower. Flavors are delicious mixed together, and I probably could of had a bowl of that for dinner and been pretty happy. 


Julie's Roll (Picture above):  Julie is the sister of the owner and a top recommendation by the waiter. This was my favorite roll of the night.  Snow crab, salmon, asapargu (no rice) wrapped lightly in seaweed then wrapped on the outside with cucumber and lightly drizzled with ponzu sauce. A must order for when you go. The crab tastes incredibly fresh and the simplicity of it with the light ponzu sauce makes it so light and refreshing. No need for soy sauce. Perfect. 


Rock Manhattan: This was a beast of a roll where each piece took two bites and was packed with a variety of ingredients - shrimp tempura, snow crab meat, jalapeno with crab and spicy tuna on top. It had a crispy topping with a variety of caviar. Excellent.
We also tried the Spider Roll, which was good - nothing fancy, just what you expect.  This is a must for us when trying a new sushi restaurant. If they can't make a good spider roll... well, I just don't know what to say.

Their order of salmon sushi (2 per order) was good but I wasn't blown away by the salmon. You want good salmon sushi or sashimi- go to Osaka instead.  

Overall, this is a new favorite sushi place for me. While a bit more pricey - the specials rolls cost between $12-16. If you check in at Yelp before 7, you get 20% off you meal. The waitstaff was excellent - courteous, filled our drinks (including my hot tea!) and management stopped by to ensure everything was good.  Another small gesture that they make that I love - each person gets their own dish of wasabi and pickled ginger. YES!  I love that no one else touches the same wasabi and I have a wealthy pile of pickled ginger all to myself.  I'll need to try again and see if it's just as good, but for the first time, not bad at all.  The other perk (who knows how long this will last) but they have a large parking to themselves. Don't valet and just park in the adjoining lot or there is street parking on the side.


The Blue Fish
5820 Washington
Houston, TX 77007
713.862.3474

August 19, 2011

Restaurant Review: Brasserie 19

It's that famous time of year in Houston where eating is plenty, drinking is plenty and good conversations are had. Houston Restaurant Week has been so popular that now, it's Houston Restaurant Weeks and spans the entire month of August.  Can't get better than $35 for a three course menu. Why, wait, yes it can. Donations are made to the Houston Food Bank!

A key factor in what I look for in a HRW menu is that their options should be a menu item that is on their regular menu. I want to try a restaurant that maybe I normally wouldn't go to regularly (price is typically a factor =) ) and this is an opportunity to try their famous menu items for a good price and good cause. 

Our first HRW was Brasserie 19, which is fairly new restaurant on West Gray. They are in the same shopping complex as Sur La Table and walking distance to one of my favorites, Swirll.  It's atmosphere is reminisce of cottage-y french cafe and the diners are varied. Some are dressed up for the town and others are more casual in jeans.  
Frustrating point of the night. At the bar wanting to see their wine menu. They hand me a iPad to look through their wine selection - the idiot in myself could not  get the thing to work. Several folks tried and after flagging down the bartender, he touches the screen and voila, wine menu. WHAT? So 15 minutes later, I finally have a glass.  

First course: A diver scallop with peas, basil and fennel puree. Yes, A diver scallop - one. Regardless, that one diver scallop was pretty darn delicious. Perfectly cooked and seared on both sides and tasted better without any of the puree, which while it was good on its own, it simply didn't add to the flavor of the scallop. I know I'm enjoying my scallop when I find myself cutting it into smaller pieces to have more "bites."
Second Course: Rainbow trout almondine with potatoes. Picture at the top. Can you see how big it was? See! The trout filled my entire plate it was so large. It was good, not too salty and most likely cooked in several tbspns of butter but didn't mask the taste of the fish. . The NY strip steak that Ross had was okay. I tend to like mine medium rare (more on the rare side - I need to see the red and juices!) and him medium, and the steak turned to be more on the medium side. It was a tad chewy and tough but the flavoring was good. I'd easily recommend the trout over the steak.
Dessert Course: Raspberry, peach and cucumber sorbet trio. Yes, I said cucumber sorbert and when the water gave me the options, I was a little skeptical. I'm glad he talked me into getting it because it was so refreshing (did I mention we were sitting outside?), light and tasted even better with a small piece of cantaloupe. The creme brulee was a creme brulee. Can't really go wrong, and of course, the crispy topping was the best part.
Overall, good place to try for Restaurant Week. Definitely have one person in your party order the sorbet and I promise you'll be just as surprised as me by how much you'll enjoy the cucumber sorbet. They were great and brought out frites and bread prior to dinner and refilled our water consistently.  Book your reservations early and don't sit outside - it's just too hot with this Texas heat. 

Brasserie 19
1962 West Gray
Houston, TX 77019
713. 524.1919

July 17, 2011

Summer Picking: Peach Cobbler Pie

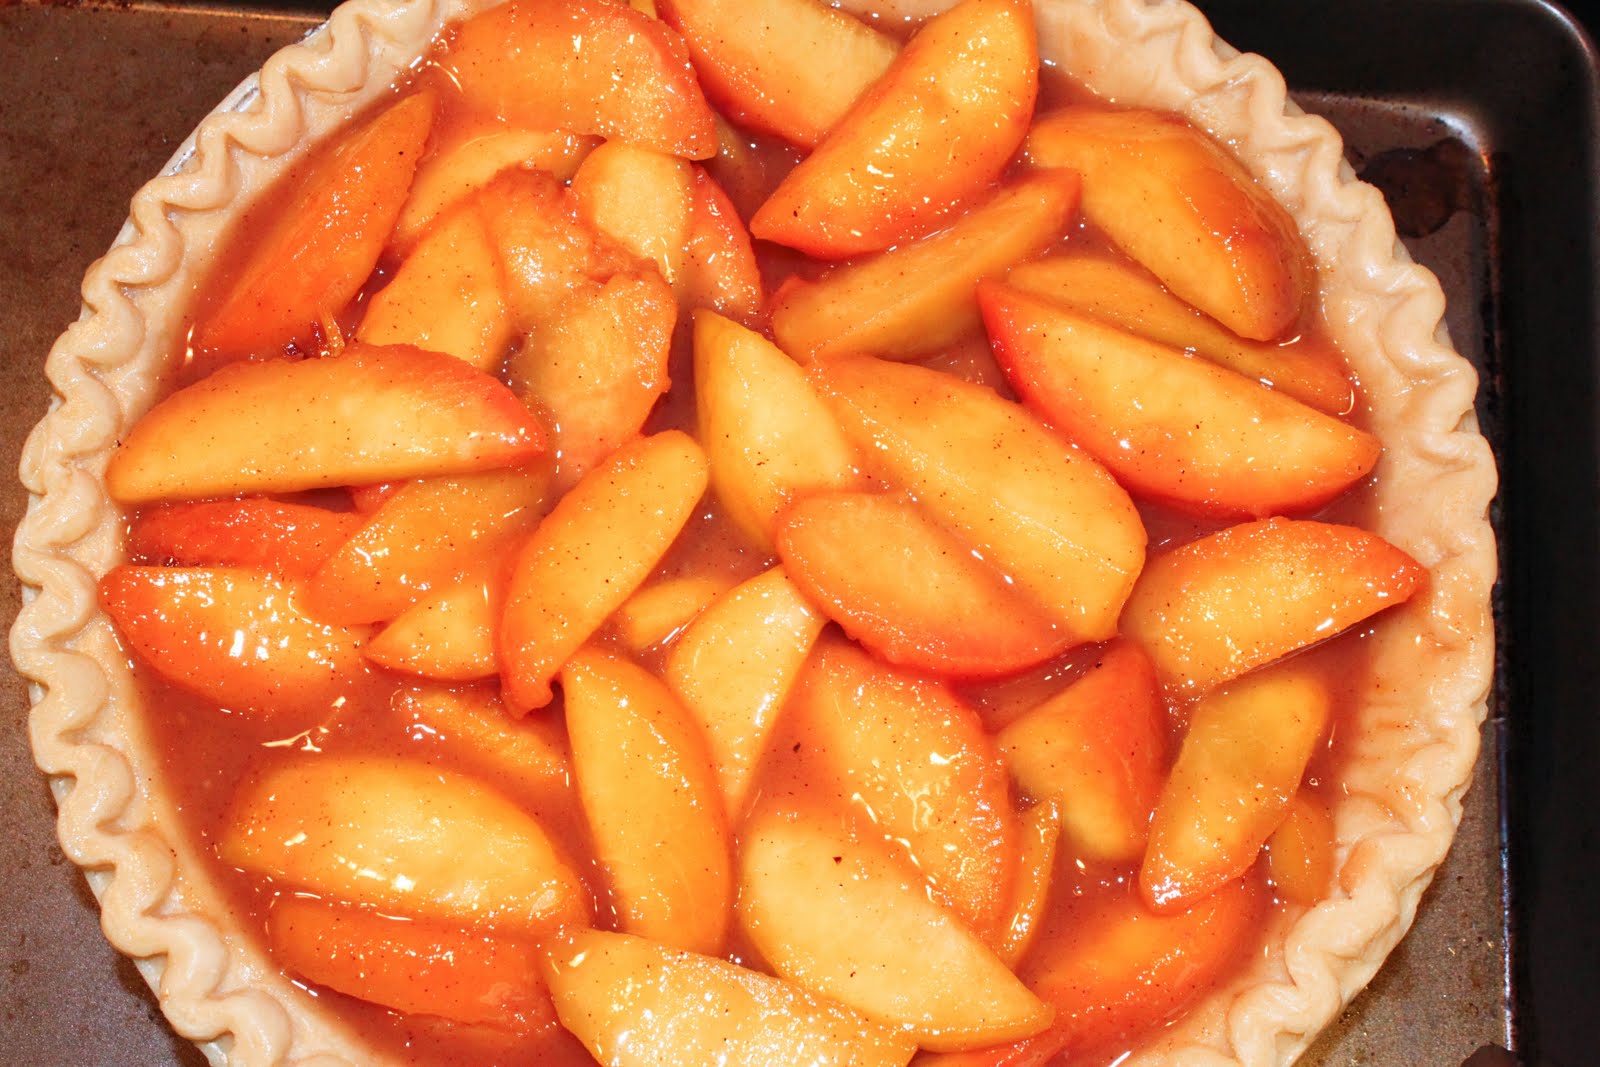
With peach season in full swing, it's hard to pass up the large, fresh peaches at the grocery store. And at $.99 per lb, it's even harder to not buy several.  While absolutely delicious on its own, my food blogs had an influx of peach desserts - from cooked peaches, peaches in cream to peach cobbler - and it was hard to resist making a sweet variation. Also, my folks were stopping by and I had an upcoming visit to my sister's so it was perfect timing to try a new recipe.

This recipe was a combination of a slew of cobbler recipes.  I made the filling based on what I thought would go well together.  Most variations I saw do not require you to cook the peaches on the stove - just toss together with the ingredients (juice, sugar, flour, etc.) - but since my peaches were incredibly firm, I needed to soften up the peaches before letting them bake in the oven.  If I had an orange, I would have added the juice and zest to the filling. 

The pie topping was courtesy of Liz, who providing her chuk apple crisp recipe. As for the melted butter on top of the butter, I omitted this and just sliced two slivers of butter and crumbled on top. My attempt to cut down on the butter...but really, what's another few slivers?

Peach Cobbler Pie
Makes 2 pies

Filling:
2 pie crusts (I get from frozen section)
12-15 large peaches (firmer peaches are better)
1 tbsp flour
Juice from 2 lemons
Zest from 2 lemon
1 tsp salt
1/2 cup sugar
1/4 cup brown sugar
2 tsp cinnamon
1 tsp nutmeg (fresh if possible)
1/2 stick butter
1/4 cup heavy cream

Pie topping:
2 cups sugar
2 cups flour
1 tsp salt
2 tsp baking powder
2 eggs
1/2 cup melted butter (optional)

1. Preheat oven to 350 degrees. Bring a large pot of water to a boil. Add a big dash of salt. Thoroughly wash the peaches. Add the peaches to the boiling water for approximately 1 minute. This will help you peel the skin off the peaches.
2. Drain the peaches immediately and put under the sink with cold water.  I briefly cover the peaches for a minute to help separate the skin. Then take off and let them cool enough to handle.  
 
3. Take a paring knife and start peeling the skin off the peaches. Cut the peaches into slices.
 
4. Zest and juice one lemon.  
5. In a pan large enough to hold the sliced peaches, melt the butter.  Once melted, add the flour. Mix well and then add in the sugar and brown sugar.  Don't worry, it will look dry and lumpy.
 
6. Add in the lemon juice, zest, salt and cream. 
7. Next, add in the peaches. Turn the heat to medium and mix well - making sure the peaches are covered in the sugar sauce. Let this cook down for a good 10 minutes on medium-medium low heat.
8. Add the cinnamon and the freshly grated nutmeg.  Take a quick taste and balance out the peaches if you need. More cinnamon, sugar, etc.  Turn off the heat and let it sit to cool just a bit.
9. While the peaches are simmering, make the pie topping. Combine the dry ingredients together.  Then crack an egg into the dry mixture and mix (chopsticks work well here) until crumbly.
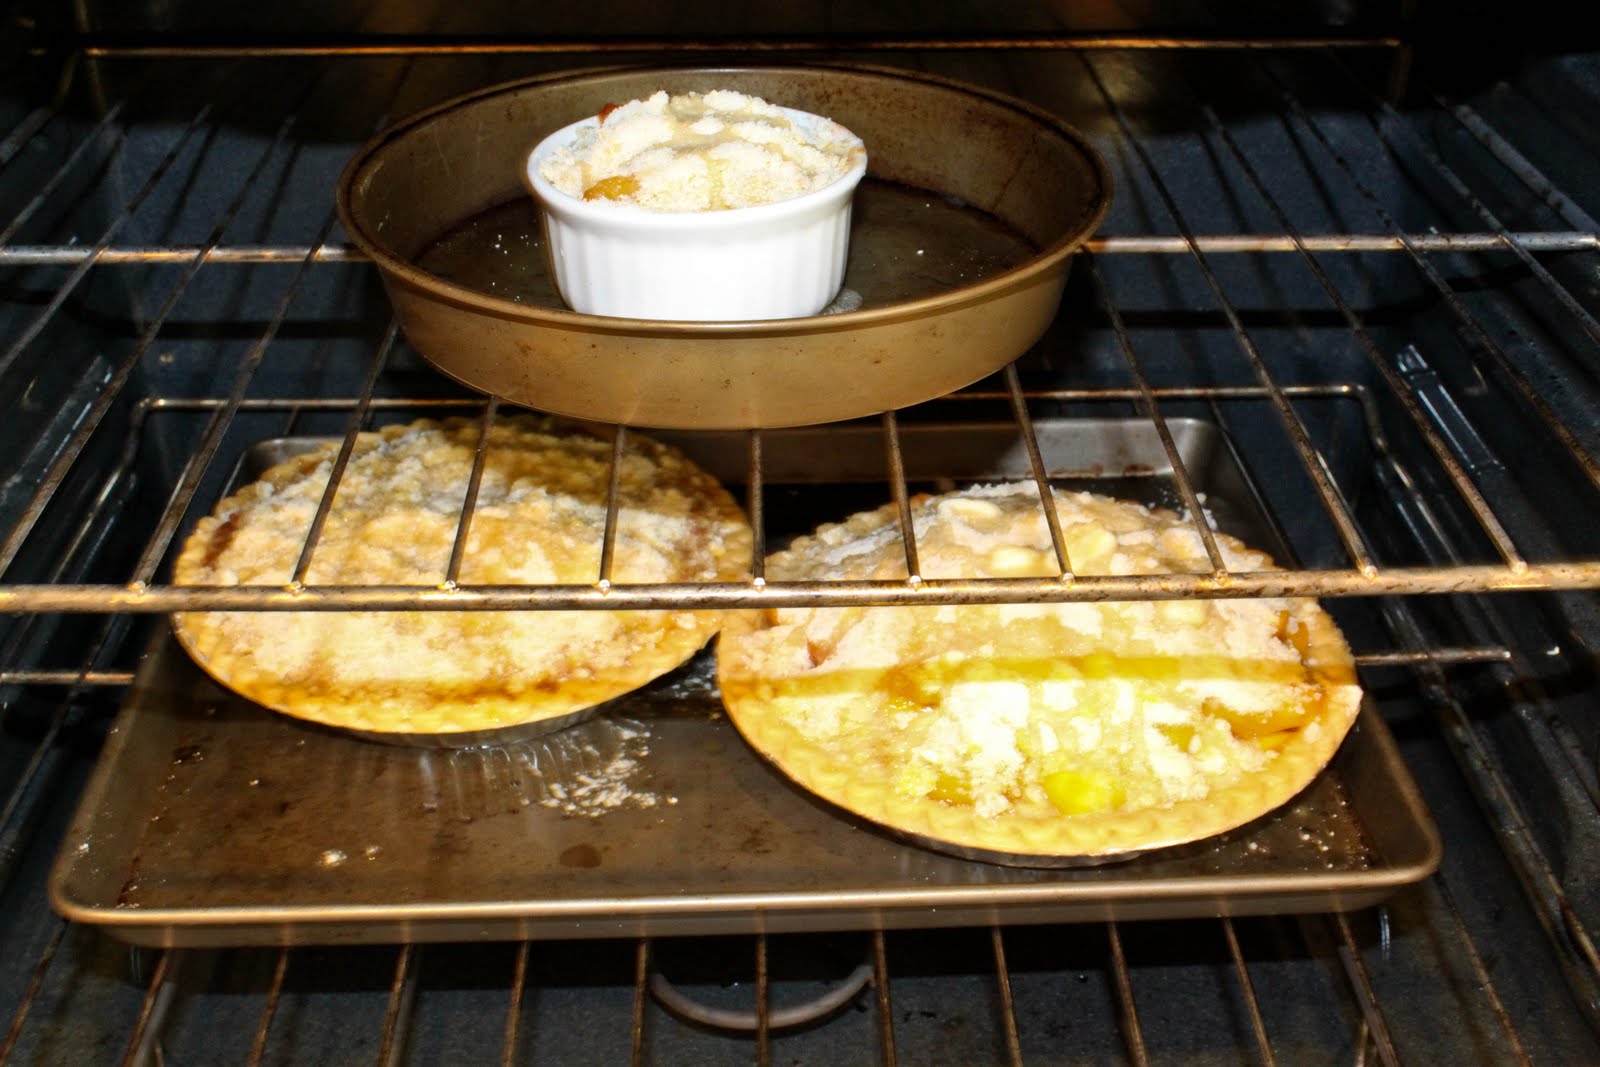
10. Put the two pie crust onto a large baking sheet or on one each.  This will help ensure that no peach goodness seeps out of the pie and into the oven. Evenly distribute the peaches into two pie crusts. Top each of the pies with the dry mixture.  Take the melted butter and pour over the top.
 
11. Bake in the oven for 45 minutes. Check periodically to make sure the tops do not burn. You'll see that I made a mini cobbler in a ramekin as well - so that I could enjoy one immediately without having to destroy the entire pie for a taste. :)
12. Take out and let it cool.  If you are transferring and don't have a pie/cake container, a cardboard box does just fine. 

July 10, 2011

Restaurant Review: Seco Latin Restaurant

Seco was a nice and bright surprise. For those not aware of the restaurant, it can easily get lost to many as it's hidden right behind the Ben and Jerry's on Kirby in Rice Village.  It's a small little restaurant/house with just a handful of tables.  Call and get reservations if you can, otherwise, it may be hard to find a seat during prime dinner hours.  

I had the grilled redfish with chimichurrri sauce served with green beans and rice. It was a cooked well and the sauce was delicious. This dish also comes with a side salad with their offering of interesting dressings - jalapeno cilantro or a tarragon vinaigrette. The tarragon vinaigrette was a first for me, and wow, did I love it. I'm not usually a fan of tarragon and only know to use in in chicken salads, but this was light, refreshing and went perfectly with their simple salad.  They also had this great homemade salsa for the chips. I have a feeling they used powdered white pepper - which is oh-so-good with egg drop soup.  I think I consumed a good two baskets of chips for sake of not wasting the salsa. Right?  

Service was great. They were nice, prompt, filled our drinks, took our orders quickly and dishes came out fairly fast. I can't justify rating this place just yet since I've only been once. However, it was great for my first time and I'll be coming back to try some other dishes. They serve Sunday brunch so that just might be our next visit. Oh, and if you don't try their dessert, walk just a few steps away to Ben and Jerry's!  

Seco Latin Cuisine
2536 Nottingham
(713) 942-0001

July 07, 2011

Smile for Breakfast: Strawberry Nutella Tarts

Remember when I had several pounds of strawberries?  Well, here is another recipe to use up a few more strawberries you have laying around.  These don't take many berries - probably about 1.5 strawberries for each tart but are so simple and quick to make. What is great is that you can freeze each one if you don't want them right away. They are perfect for breakfast if you have 25 minutes for them to bake - or an afternoon snack!

Nutella is golden. I love love love nutella. Did I mention that I love nutella?  I have a few bananas in the freezer, and I think I'll be making some banana and nutella tarts soon.

Strawberry Nutella Tarts
(Makes 9 tarts) 

1 lb strawberries, sliced 
Nutella spread (however much you need)
2 puff pastry sheets (can be found in the frozen pastry section of the grocery store)
3 tbsp sugar

1. Thoroughly wash the strawberries. Cut the stem out and slice. 
2. Unroll the puff pastry sheet.  Cut into 9 equal squares/rectangles.  For half of the squares, spread a good serving of nutella leaving a clean edge. 
 
3. Stack a few slices of strawberries on top. You can sprinkle sugar on the strawberries if you like it super sweet, but for me, the nutella is sweet enough for the tart.
  
4.  Take the un-nutella squares and put on top of the strawberries. Using your finger, make sure that the edges are all sealed. I used a fork to create a fun edging around each tart. Sprinkle sugar on top of each one and using a toothpick, poke a few holes on the top of each tart.
  
5. I put these on a baking sheet lined with parchment paper and tossed them in the freezer. Once frozen, I was able to easily bag several in one bag without the worry of them sticking to each other.  When you are ready to eat, preheat your oven to 375 degrees. Put in a pan and cook for at least 25 minutes. As you can see below, I didn't do a very good job about sealing the edges and lost a little bit of nutella.